How does permanent makeup emphasize natural beauty?
Permanent makeup has already been appreciated by hundreds of thousands of women. However, some girls are still afraid that it will turn out unnatural or spoil the skin of the face. In this article we will tell you about all the stages of permanent makeup in the salon, and its types. Our masters will answer the most frequent questions of clients.
With micropigmentation you:
| Stop wasting time every day to put on makeup | Only 2-3 hours every 1.5-2 years vs. 30-60 minutes daily for regular makeup. |
| You'll forget about decorative cosmetics. | It'll cut costs. |
| You will always look a 10/10 | Permanent makeup stays flawless no matter the weather or what you're doing |
| Enhance your natural beauty | Contouring makeup naturally and discreetly highlights your strengths and conceals any flaws. |
Sign up for a free consultation at Annazur Beauty Organic Spa - our masters will tell you about the procedure in detail to eliminate any of your fears.
The permanent makeup process: all the steps, step by step
Contour makeup does not require complex preparation. The procedure takes only 2-3 hours. Subsequent corrections - up to 1 hour. It is not surprising that many women refuse classic makeup and choose micropigmentation.
Permanent makeup is recommended for girls who have:
-
very light-colored, naturally thin eyebrows, and eyelashes;
-
localized alopecia of the eyebrows;
-
small, colorless lips;
-
asymmetrical eyebrows, lips;
-
allergies to decorative cosmetics.
Contour makeup not only makes lips, eyebrows, eyelashes more beautiful. It is also used to camouflage scars, stretch marks, scars, and white spots (vitiligo).
1. Counseling and planning - 15 minutes
This is the first and very important stage. This is where the makeup artist and the client:
- Determine the area for permanent makeup. It can be eyebrows, lips, intercostal space, arrows on the eyes, areas of alopecia on the head.
- Select the shape and color. The master is guided by the wishes of the client. But also takes into account the oval of the face, the natural shape of eyebrows, eyelashes, and lips. Advises how it will be better for a particular woman. Also determines the tone of makeup, taking into account the natural color of the face and hair.
- Clarify contraindications and health nuances. It is necessary to talk about all chronic diseases and medications taken. Especially those associated with the cardiovascular system, that can cause blood clotting and blood pressure issues. Additionally, the master makes allergy tests to make sure that there are no acute reactions to tattooing materials.
MAKEUP ARTIST'S OPINION!
Often at the consultation clients express concerns and fears. But they are often based on rumors and myths:
2. Preparation for the procedure - up to 15 minutes
The client's face is prepared for makeup:
- The skin is cleansed. Women are warned that it is not necessary to apply decorative cosmetics before the procedure. But if there are any remnants of mascara, eyeliner, eye shadow, or cosmetic pencil, they are washed off with micellar water.
- Disinfect and degrease the skin. The first will exclude infection. The second will prevent grease from clogging the skin pores.
- Anesthetic is applied. Local anesthetic creams and gels are used. After application, wait 5-10 minutes so that the area of the face has time to numb.
3. sketching - 15-60 minutes depending on complexity
Creating a sketch is a key step. At this point you can once again express your wishes, finally approve the form.
Sketch is made in stages:
- Direct drawing. Makeup artist draws the sketch with cosmetic pencil and brow-paste. Adheres to the rules of the golden ratio. Takes into account facial features, lines of lips, eyebrows, eyelids and facial contour.
- Harmonization. The sketch is shown to the client and agreed with him. At this point it is possible to express wishes to change the drawing.
- Make adjustments. Correct the sketch if you are not satisfied with the result or have comments.
Will micropigmentation look natural?
During the application of the sketch, it may seem that the future makeup looks unnaturally bright and rough. This is normal, since the pattern is drawn with pencils and paste.
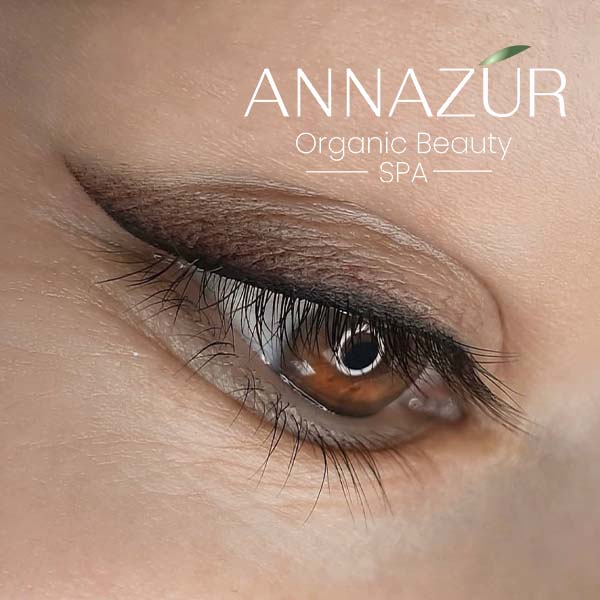
But the permanent makeup itself looks natural. Modern techniques, such as blending, hair technique, powder spraying, give the most organic effect. They simply emphasize your own facial contours.
Currently on trend:
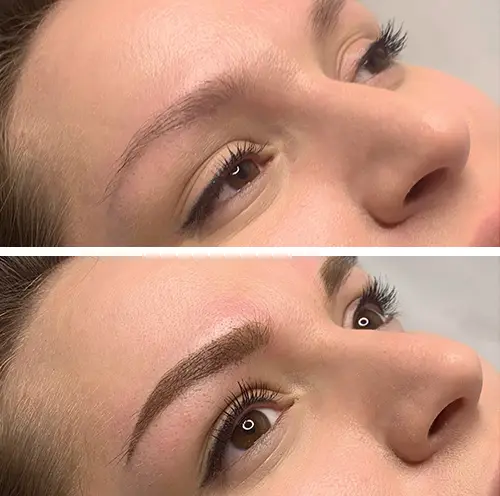
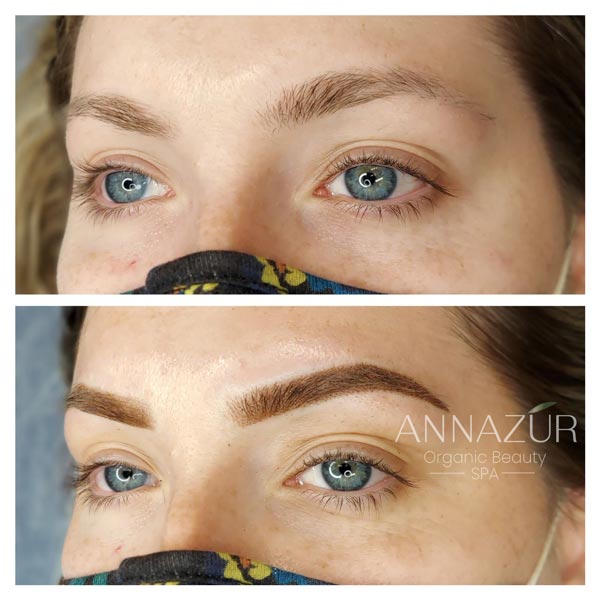
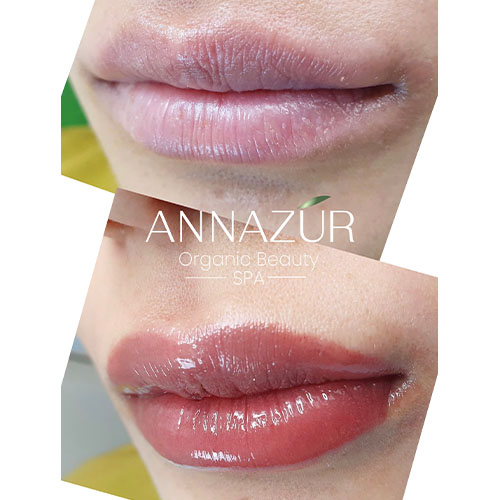
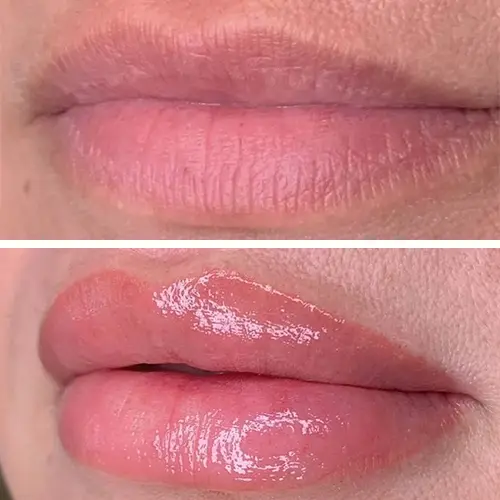
You can make sure that contour makeup looks natural by looking at works of our masters.
4. Pigment application - about 1 hour for one zone
A key step in the micropigmentation process. Makeup artist:
- Prepare pigment. Takes a matching shade or creates a customized one by mixing several different shades.
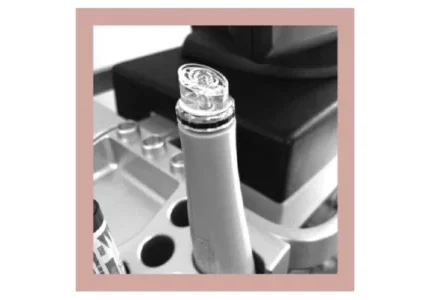
- Applies pigment with a machine. Soaks the needle in pigment. Conducts a special machine for permanent makeup on the entire area. Clearly follows the template.
- Supervises the work. Moves from thin lines to thicker lines. Ensures that the needle is at the correct depth and that the pigment is evenly distributed.
There are several techniques of permanent makeup. Its type is determined at the sketch stage. The choice depends on the desired result and the area to be improved.
One of the following techniques is used in the micropigmentation process:
5. Checking and finalizing - up to 20 minutes
Immediately after pigment application, the master:
- Cleanses the skin. Removes the pigment and anesthetic gel with micellar water.
- Determines the result. First, he visually assesses the resulting makeup. Then gives the woman a mirror so that she could also look at the final work and express wishes for revision.
- Correction of small details. Usually these are small details: individual not drawn hairs, spot areas with poor pigment filling. They are, without problems, corrected.
6. Care recommendations - to be observed for up to a month
After the procedure, the master treats the areas of permanent makeup antiseptic and healing gel. Gives recommendations on skin care. Be sure to follow them. They will help accelerate healing, maintain the quality of permanent makeup, and prolong its effect.
Specific care is required for the first month after the procedure. During:
The main thing in skin care after the procedure is - do not tear off the crusts. After 3-5 days, in the area of the tattoo, skin will begin to heal and the dry areas will appear. They categorically can not be scraped, wet, peeled off or scrubbed. Otherwise, together with them you will remove the permanent makeup. Just let them fall off on their own.
7. Correction
In the first month after permanent makeup skin gets used to the pigment. Part of it is inevitably washed out with lymph. Therefore, after 4-6 weeks, correction is mandatory.
Correction is necessary to:
- Intensify the color. Restore its evenness and intensify the saturation in areas where it has faded.
- Correct the shape. Align symmetry, correct contour and lengthen lines.
- Correct imperfections after exfoliation. Correct uneven pigment distribution and gaps.
Makeup artists should also assess the condition of the skin. Determine if there is any redness, inflammation, how the healing went. Be sure to share with him/her how you felt during the month before the correction. Tell him if there was anything that bothered you.
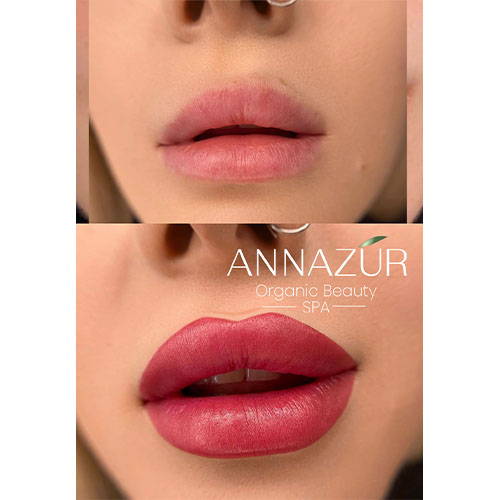
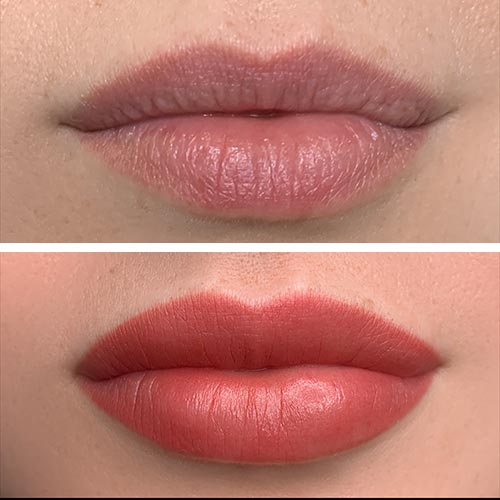
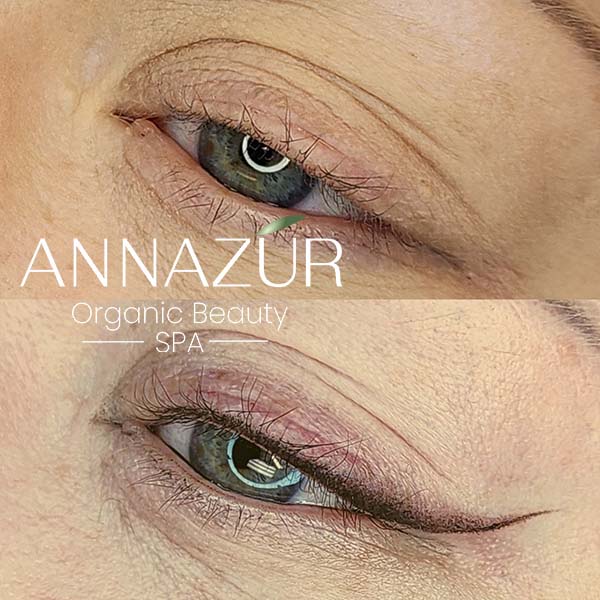
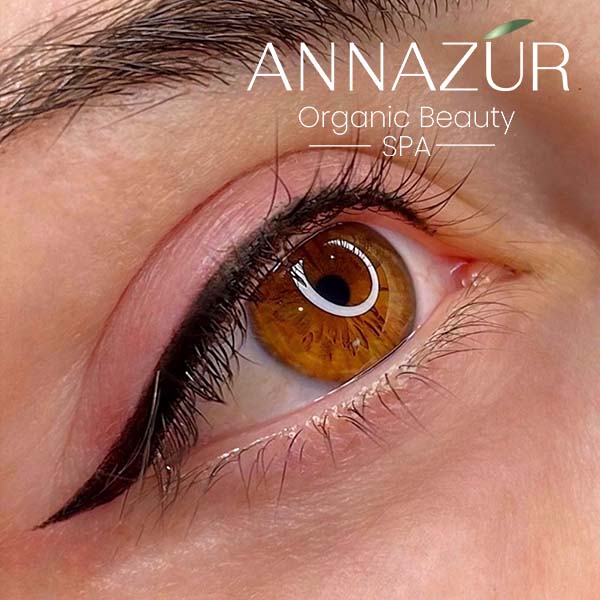
Our clients: before and after photos
Do you want to look as stunning and forget about decorative cosmetics? Become one of our clients! Annazur Beauty Organic Spa has a special promotion for first time visitors!
Sign up today and we will book you a discounted price for the first session:
How to prepare for the procedure?
To get a perfect result and the procedure went smoothly, we recommend:
MAKEUP ARTIST TIP!
If you are prone to herpetic rashes, I recommend taking anti-herpes medications for a week. Start the course 2 days before the procedure and take them for another 5 days after. The fact is that in the process, the needles violate the integrity of the skin. This can lead to an exacerbation of herpetic infection.
Another tip: do not perform permanent makeup during ovulation and the first 3 days of menstruation. It is better to choose the second half of the cycle for the procedure.
Questions and Answers: Everything you need to know about permanent makeup for beginners
It can be difficult to decide to get permanent makeup for the first time. We understand that beginners have a lot of fears and doubts. Therefore, we have prepared answers to the most commonly asked questions for those who are still just considering micropigmentation.
Does it hurt?
During permanent makeup there is a slight discomfort, burning, tingling. The severity depends on the pain threshold of a particular person. But even people with hypersensitivity assess the sensations as tolerable.
To reduce the pain, we use creams, gels with anesthetic effects. In addition, the needles are thin and small. They penetrate to a depth of 0.5 mm. Therefore, the pain cannot in principle be severe. And there is no risk of capillary damage.
What if you don't like the result?
The result of contour makeup is discussed in advance at the consultation. Our masters discuss in detail the type of dermopigmentation, its shape, contour and color. They create a sketch of the future makeup.
After the procedure, minor flaws are possible. They are corrected after 4-6 weeks: to enhance the color, correct the shape, and add pigment if it is unevenly absorbed.
Will the makeup look natural?
Definitely yes. We use natural materials, work in techniques that look as natural as possible. They imitate natural eyebrow hairs, enhance your own lip color, and emphasize the thickness of eyelashes.
How long does the makeup last?
On average, micropigmentation lasts 1.5-2 years. Depending on the type of skin, its oiliness, the rate of cell renewal, the quality of care, and the effect will last from 1 to 3 years. After that, it will need to be corrected.
How safe is the procedure?
We have a state license, and our masters have certificates confirming their high qualifications. We use safe, gentle techniques.
We observe sanitary norms, use disposable sterile materials, and carefully disinfect instruments after each client. Our salon is equipped with modern equipment.
What will I look like immediately after the procedure?
In the first week, the pigment will be brighter and darker than it should be. Also, the area of intervention will be slightly red and swollen. This is a normal phenomenon that goes away in 5-7 days.
The pigment will acquire its final color after 4-6 weeks. At that time, you will need to come in for a touch-up to correct the shade and shape.
What if I have allergies?
Before every procedure, we always perform skin tests. This is how we make sure that you are not allergic to the materials. If you are prone to allergic reactions, be sure to inform the technician.
How long does the skin take to heal?
Initial healing takes up to 5-7 days. Final healing takes up to a month. During this time, it is necessary to carefully care for the skin, so that the makeup remains high-quality.
Can permanent makeup be removed?
If you have completely changed your mind about wearing permanent makeup, there is nothing irreparable. It can be completely removed by laser or remover. But these services are used only in case of poor quality micropigmentation.
All clients of our salon were 100% satisfied with the results. And they never had to get rid of contour makeup.
Are there any contraindications?
Permanent makeup is not recommended in the presence of:
- pregnancy;
- diabetes mellitus;
- hematopoietic diseases;
- autoimmune diseases;
- oncology;
- a tendency to keloid scarring;
- dermatitis, psoriasis;
- recent surgeries.
The procedure is postponed for a while if:
- skin rashes, scaling, inflammation, herpetic ulcers;
- conjunctivitis has occurred;
- the woman is taking immunosuppressants, blood thinners;
- the body is weakened by illness, such as a cold;
- you have unstable blood pressure.
Can there be adverse effects?
Standard complications following the procedure include:
- Skin swelling;
- redness;
- watery eyes;
- dry skin.
Severe consequences are excluded at Annazur Beauty Organic Spa. Our employees are qualified masters. But when turning to inexperienced or unscrupulous artists after permanent makeup is possible:
- scars,
- pigment discoloration;
- infections;
- trauma to the lips, eyes, face;
- granulomas on the skin.

